Appearance
Quick Start
This guide gets you from sign-up to your first risk assessment in under 5 minutes.
Prerequisites
- A SignalBreak account (request access)
- At least one AI-powered system you want to monitor
⚠️ Before You Begin: Setup Order Matters
SignalBreak requires configuration in a specific order. Skipping steps will result in errors like "Model not enabled" or "No workflows affected."
Required Setup Sequence:
1️⃣ SELECT PROVIDERS
   ↓ (Choose which AI vendors you use)
2️⃣ ENABLE MODELS
   ↓ (Select which models you use from those providers)
3️⃣ CREATE WORKFLOWS
   ↓ (Define your AI-powered systems)
4️⃣ BIND MODELS TO WORKFLOWS
   ↓ (Connect workflows to enabled models)
5️⃣ CREATE SCENARIOS (Optional)
   ↓ (Plan for disruptions)
6️⃣ EXECUTE SCENARIOS
   └─ (Analyze impact on your workflows)
Why this order?
- Providers first: The platform needs to know which vendors you use
- Models second: You must enable specific models before binding them (enforced with validation)
- Workflows third: Define what needs monitoring
- Bindings fourth: Connect workflows to enabled models (fails if model not enabled)
- Scenarios last: Can only analyze impact on workflows with complete bindings
Common Error
If you try to bind a model to a workflow before enabling that model, you'll get:
400 Bad Request: Model not enabled for your accountStep 0: Select Your Providers
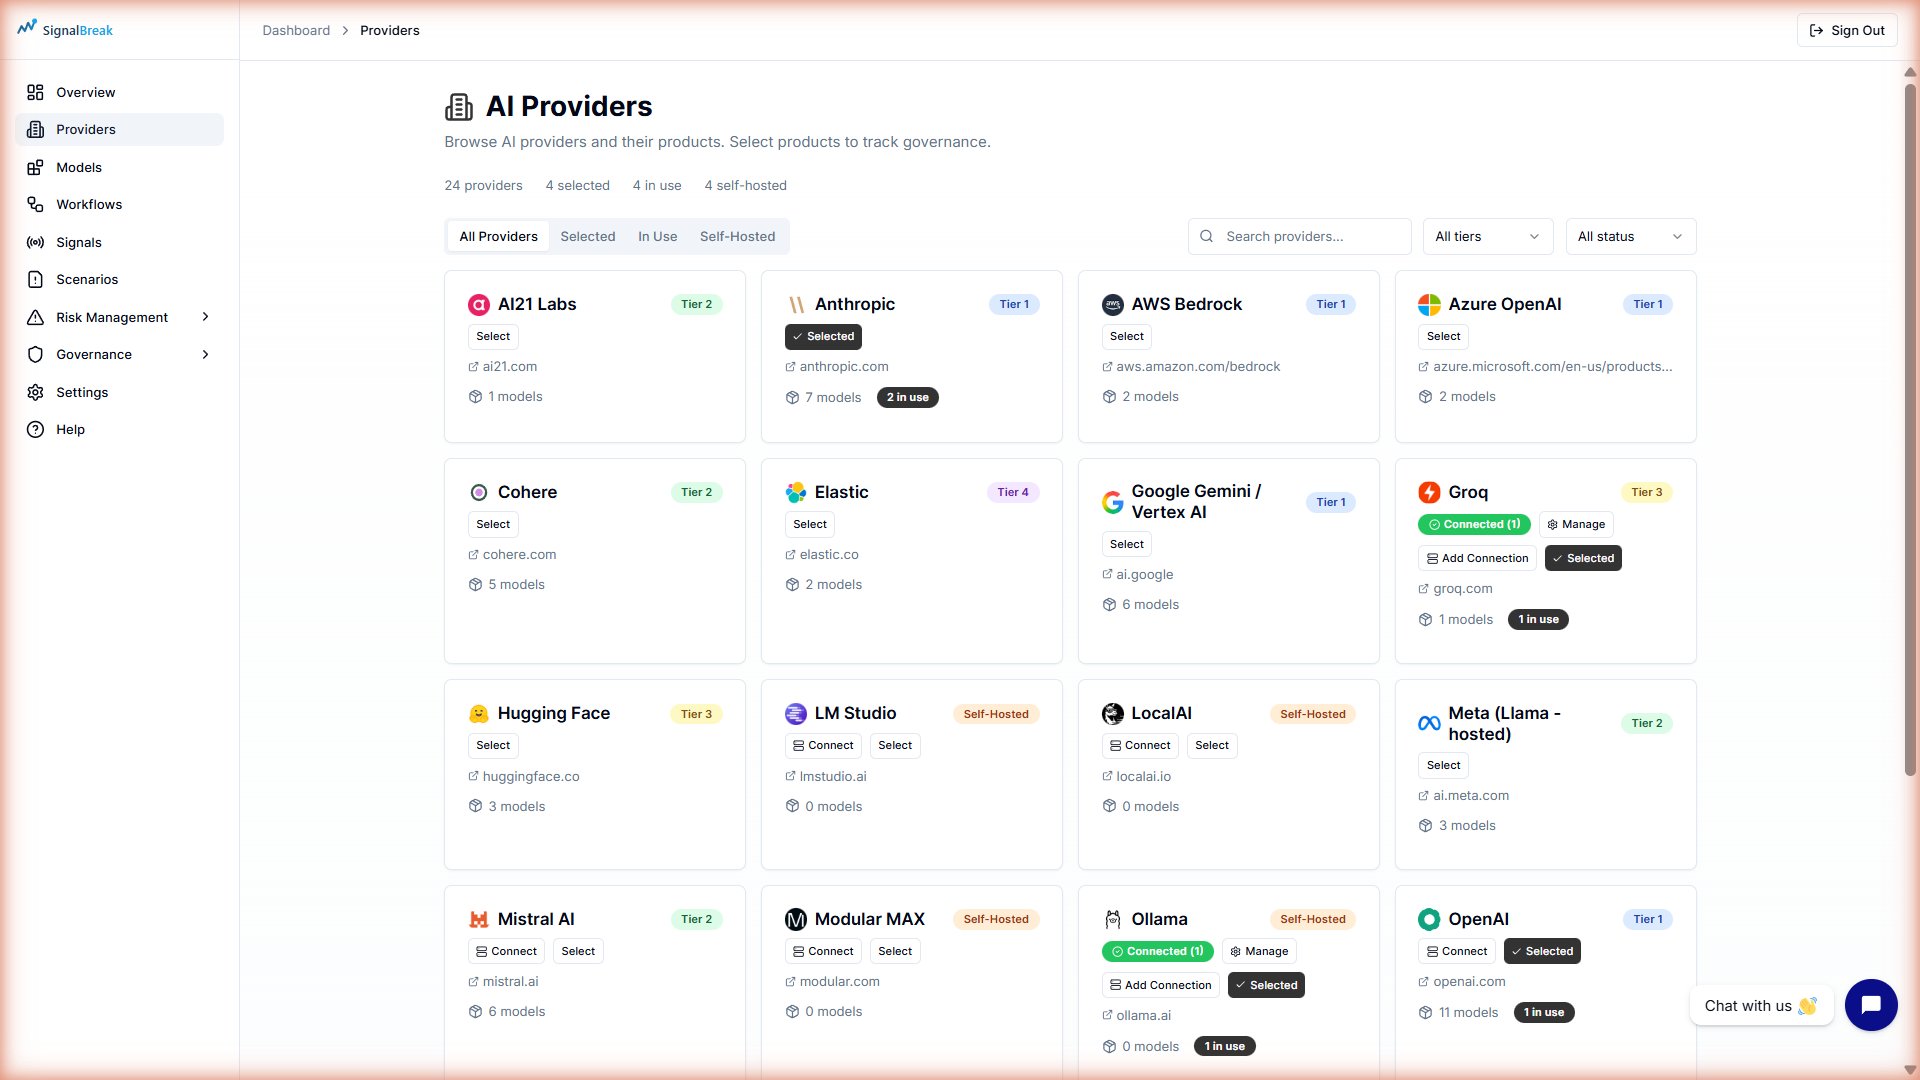
Before creating workflows, tell SignalBreak which AI providers you use.
- Navigate to Providers → Directory in the sidebar
- Browse the provider catalog (50+ providers available)
- Click Select Provider on each provider you use
- Example: OpenAI, Anthropic, Google AI
- Confirm the provider is now in your Selected Providers list
How Many Providers?
Select all providers you use across your organization, not just for one workflow. You'll choose specific models per workflow in Step 2.
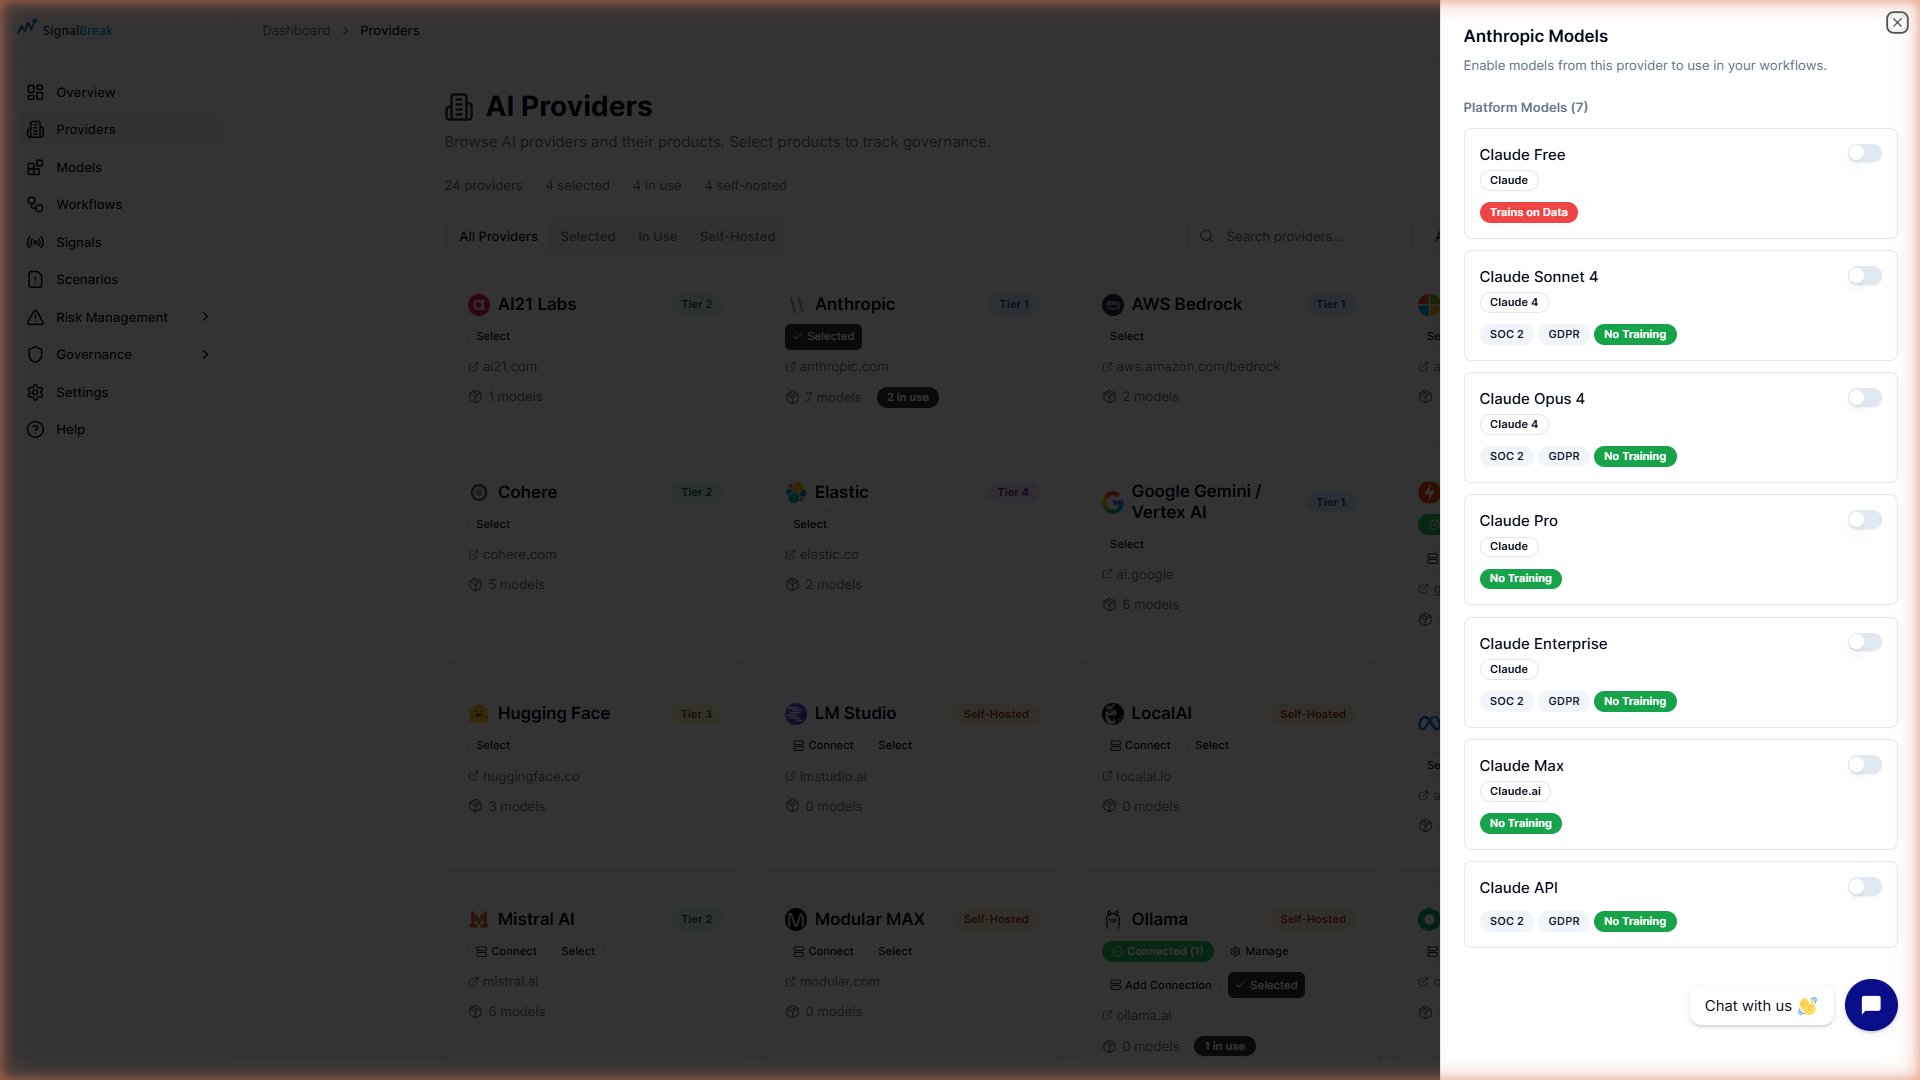
Step 1: Enable Your Models
After selecting providers, enable the specific models you use.
- Navigate to Providers → Directory → Products tab
- For each selected provider:
- Expand the provider row
- Review available models (e.g., "GPT-4o", "Claude Sonnet 3.5")
- Click Enable on models you use
- Verify enabled models appear in your Products list
Required Step
You MUST enable models here before creating workflow bindings. The binding step validates that models are enabled and will fail if you skip this step.
Example Enabled Models:
- OpenAI:
gpt-4o,gpt-4o-mini,gpt-3.5-turbo - Anthropic:
claude-3-5-sonnet-20241022,claude-3-5-haiku-20241022 - Google:
gemini-2.0-flash-exp
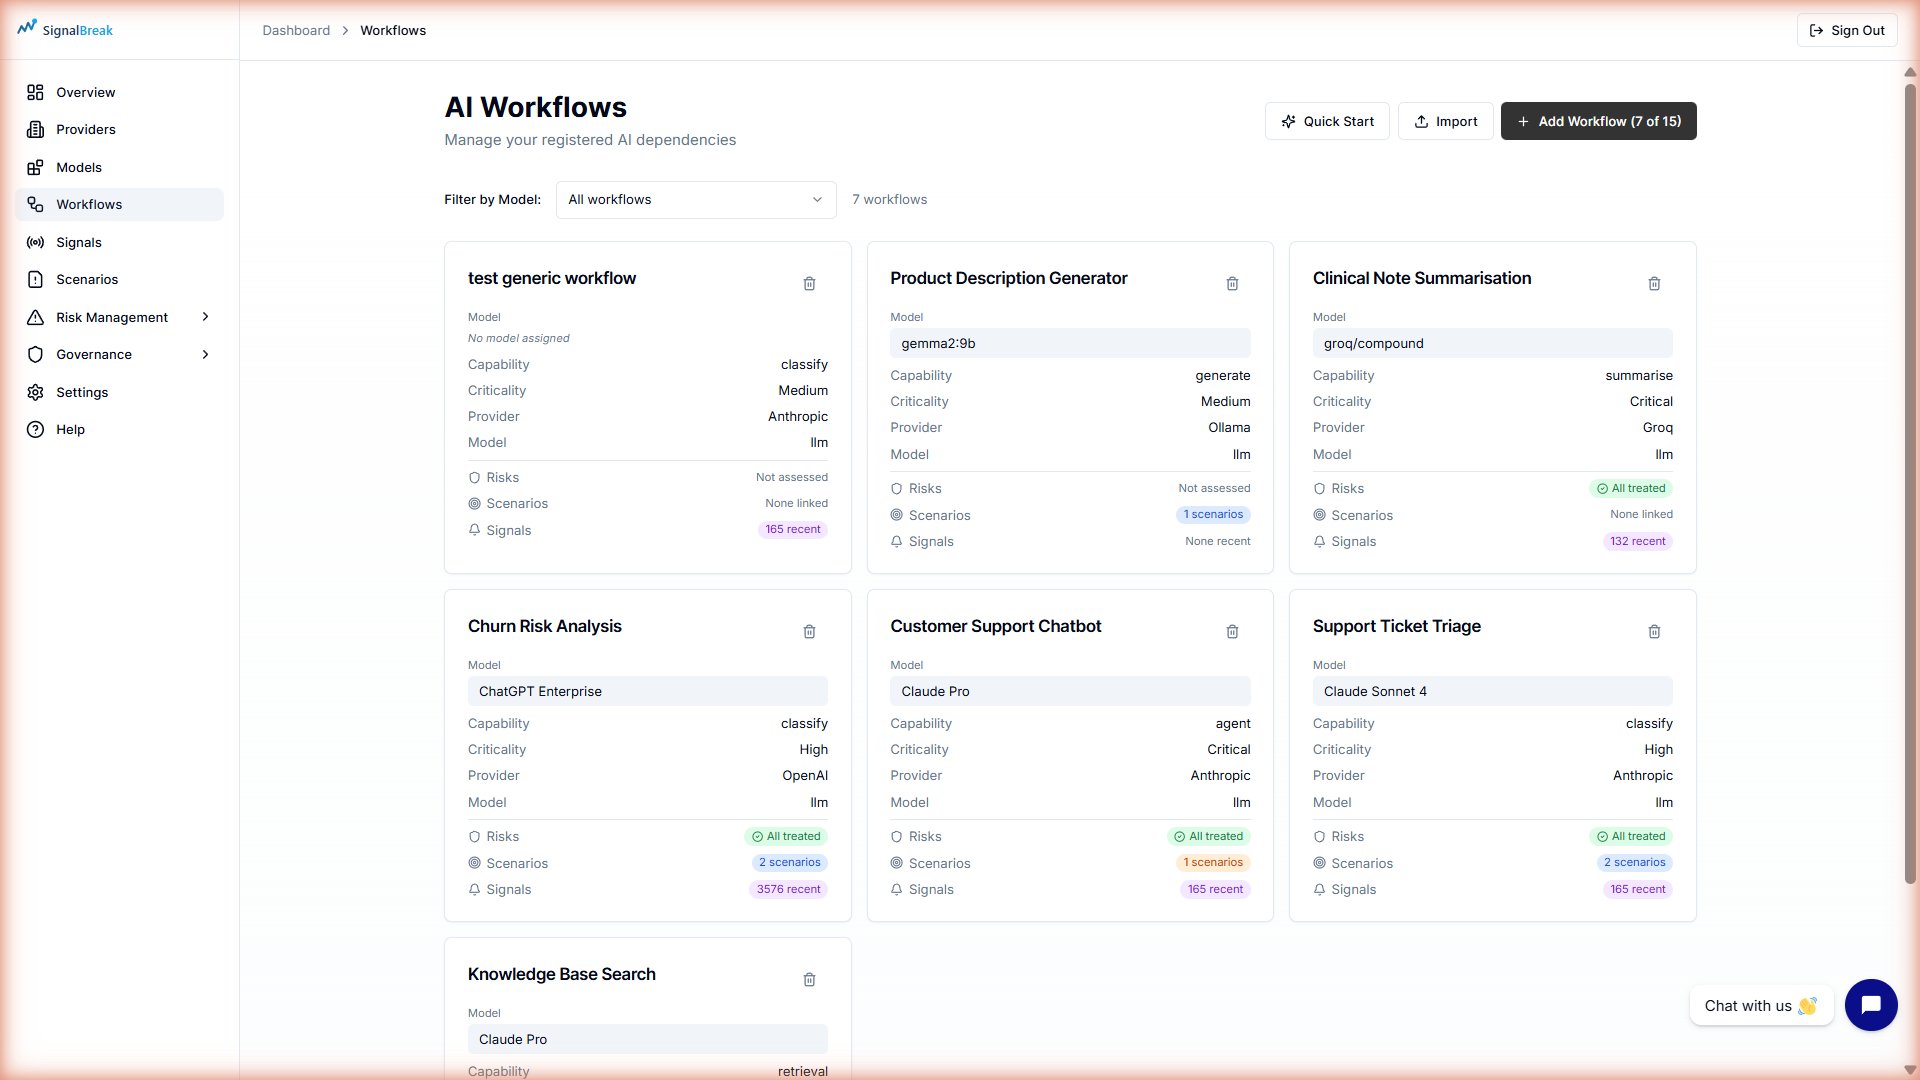
Step 2: Create Your First Workflow
A workflow represents an AI-powered system or process in your organisation.
- Navigate to Workflows in the sidebar
- Click New Workflow or Add Workflow
- Fill in the required fields:
| Field | What to Enter | Example |
|---|---|---|
| Workflow Name | Descriptive name | "Customer Support Chatbot" |
| AI Capability | What the AI does | Generate for text generation |
| Criticality | Business importance | High for customer-facing |
| Category | Business function | Customer Support |
| RACI Roles | Responsible/Accountable/Consulted/Informed | Assign team roles |
Optional but Recommended:
- Description: What this workflow does
- Owner: Person responsible for this workflow
- Business Context: Why this workflow matters
- Click Create Workflow
Workflow Without Bindings
At this stage, your workflow exists but isn't being monitored yet. You'll connect it to models in Step 3.
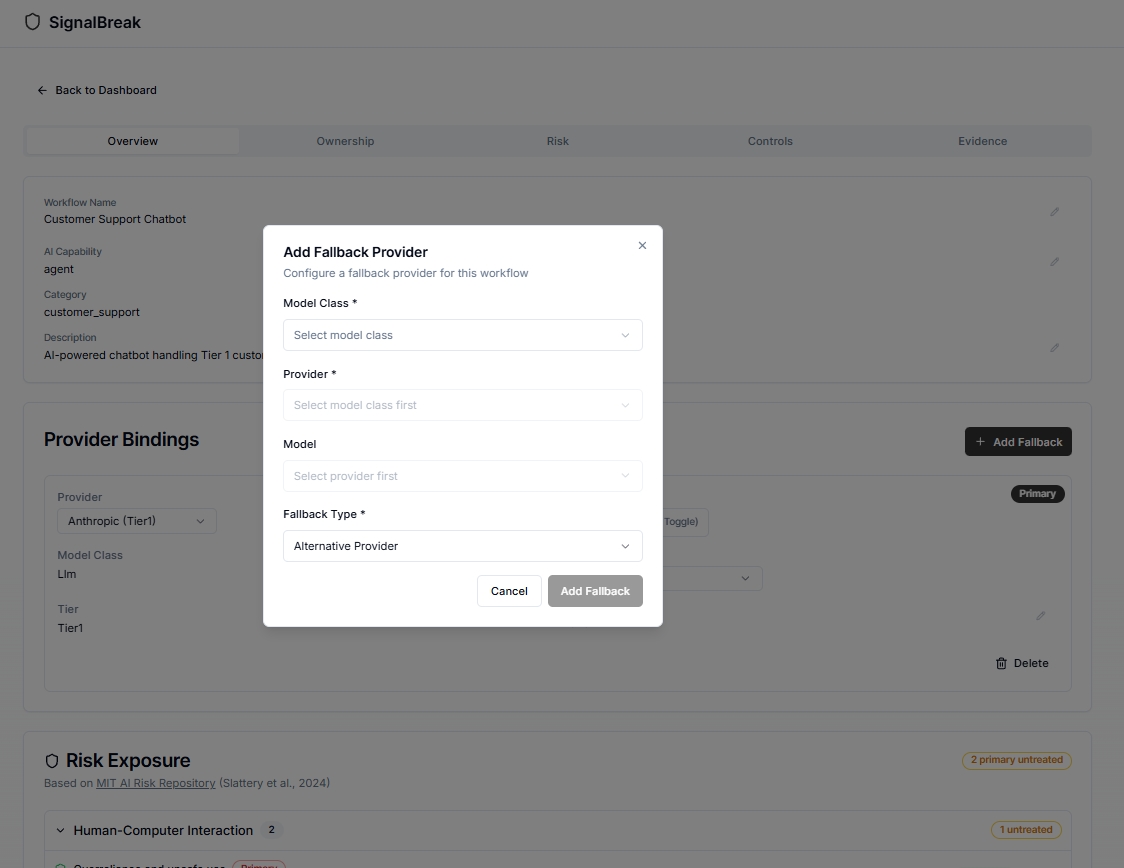
Step 3: Bind Models to Your Workflow
After creating the workflow, connect it to the models you enabled in Step 1.
- On your workflow detail page, scroll to Provider Bindings section
- Click Add Binding (or Add Provider Binding)
- Select a provider from your enabled providers
- The dropdown only shows providers you selected in Step 0
- Choose a model from your enabled models
- The dropdown only shows models you enabled in Step 1
- If no models appear, return to Step 1 to enable models
- Set the binding role:
- Primary — Main provider for this workflow
- Fallback — Backup provider if primary fails
- Configure fallback type (if applicable):
- Same Provider, Different Model
- Alternative Provider
- No Fallback
- Click Save Binding
Validation Error?
If you see "400 Bad Request: Model not enabled", you skipped Step 1. Go back and enable the model under Providers → Directory → Products.
Best Practice: Add at least one fallback binding for Critical/High workflows to minimize downtime risk.
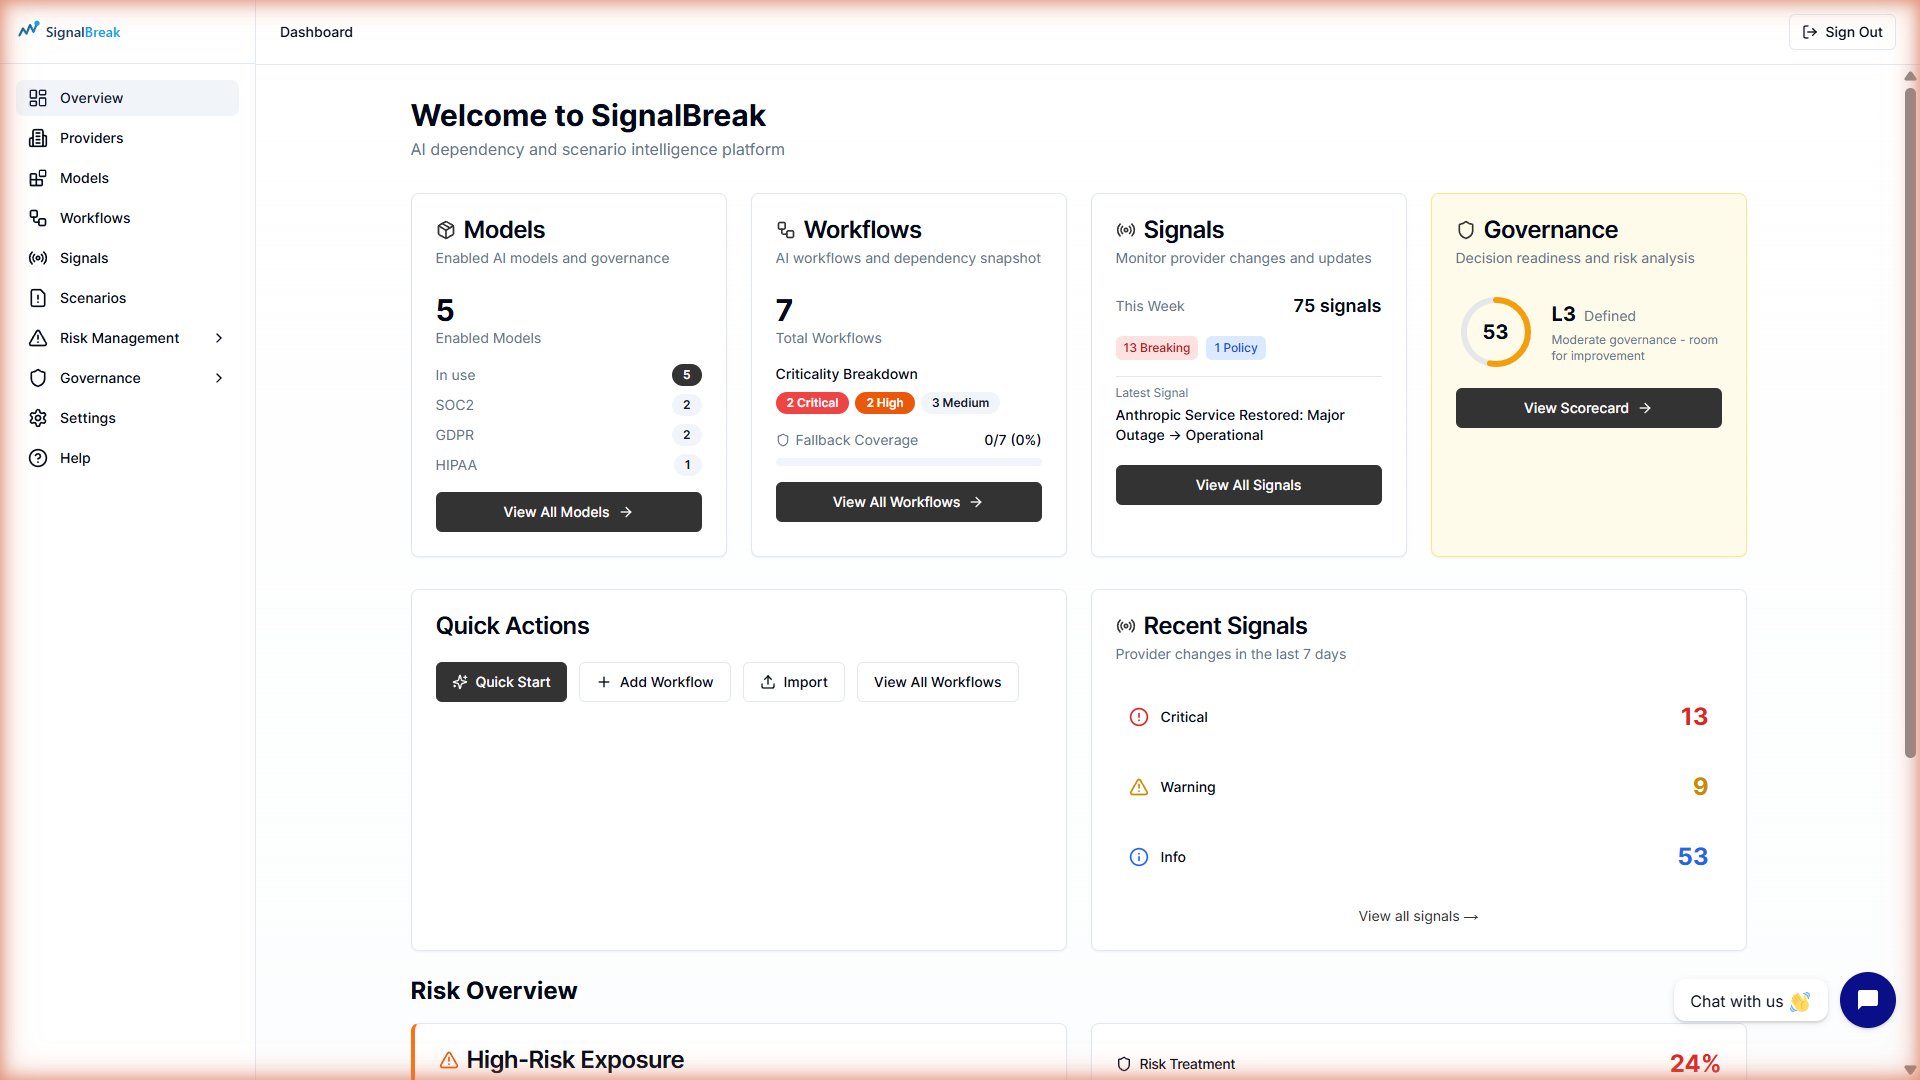
Step 4: Check Your Dashboard
Return to the Dashboard to see your setup in action:
- 🔢 Models Widget — Shows total enabled models
- 📋 Workflows Widget — Shows workflow count and criticality breakdown
- 🟢 Provider Health — Current status of your bound providers
- 📊 Risk Score — Overall risk across your workflows
- 🔔 Recent Signals — Events affecting your providers
Success!
If you see your workflow count increase and provider health indicators, your setup is working. SignalBreak is now monitoring your AI dependencies.
Step 5: Create a Scenario (Optional)
Scenarios let you plan for disruptions like provider outages or model deprecations.
- Navigate to Scenarios in the sidebar
- Click Create Scenario
- Fill in the scenario details:
- Scenario Name: "OpenAI GPT-4o Outage"
- Scenario Type: Provider Unavailable
- Target Model: Select the model to simulate disruption (must be enabled in Step 1)
- Click Create Scenario
- Click Execute Scenario to analyze impact
What Happens During Execution:
- SignalBreak identifies which workflows use the target model
- Calculates impact scores based on workflow criticality
- Generates mitigation recommendations
- Shows which workflows would be affected
Requires Complete Setup
Scenario execution requires workflows with bindings to the target model. If you get "No workflows affected," add bindings in Step 3 first.
Step 6: Explore Governance (Optional)
If compliance matters to you:
- Navigate to Governance in the sidebar
- View your scores against ISO 42001, NIST AI RMF, or EU AI Act
- Click a framework to see control-level details
- Configure Risk Appetite to set your risk tolerance levels
- Generate Evidence Packs for audits or board reports
What's Next?
Now that you've completed basic setup, explore advanced features:
| Add more workflows | Map all your AI dependencies across your organization |
| Configure notifications | Get alerted when risks emerge or signals fire |
| Set up risk appetite | Define acceptable risk levels by business sector |
| Generate evidence packs | Create governance reports for audits and boards |
| Invite your team | Collaborate on AI governance with RACI roles |
| Explore risk management | Track risks, decisions, and remediation in the Risk Register |
Common Setup Errors & Solutions
| Error | Cause | Solution |
|---|---|---|
| "Model not enabled" | Trying to bind a model before enabling it | Go to Providers → Products and enable the model first |
| "No workflows affected" (in scenario execution) | No workflows bind to the target model | Create bindings for workflows using that model in Step 3 |
| Empty model dropdown | No models enabled for selected provider | Enable models in Step 1 before creating bindings |
| Cannot create binding | Provider or model not found | Verify provider is selected (Step 0) and model is enabled (Step 1) |
| Workflow limit reached | Licence limitation | Contact your account manager or delete unused workflows |
Need Help?
- 📖 Read the full Workflows guide
- 📖 Provider Directory — Browse all 50+ supported providers
- 📖 Risk Scenarios — Advanced scenario planning
- 💬 Chat with us via the widget in the bottom-right
- 📧 Email support@signalbreak.io